Change Data Capture (CDC):
For any ETL requirement that involves huge amount of data, most of the problem is solved when you eliminate repeated or redundant process in your data storage mechanism. Basically, you should not repeat the work to copy or move the data that you have it already in your destination datastore. Hence the best option will be is to copy only the data has changed since the last time the pipeline has run in the source datastore. For this the recently released feature of Change Data Capture (CDC) from Azure comes handy. In this article we will not be looking at the basics instead we are going to see a step-by-step implementation in azure data factory. If you want to know about the logical overview of CDC please refer to my previous article where I have discussed about this.
Demo:
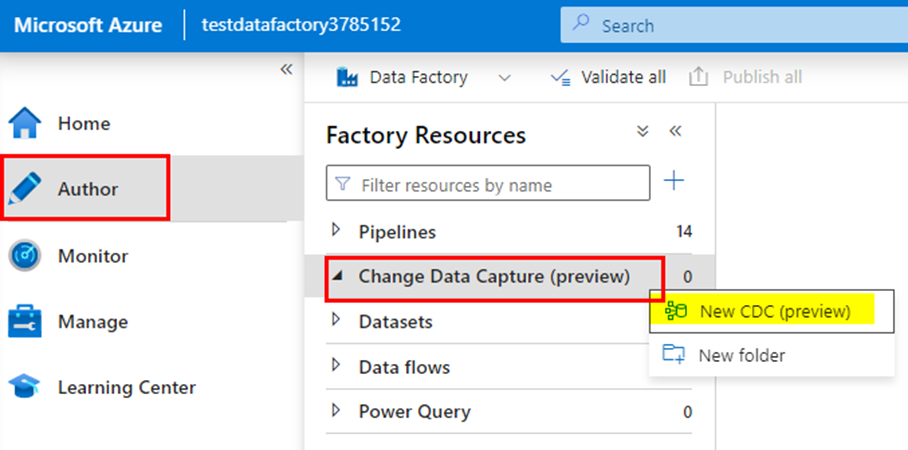
Go to data factory studio and under the Factory resources option and beneath the pipelines option there will be CDC feature enabled.
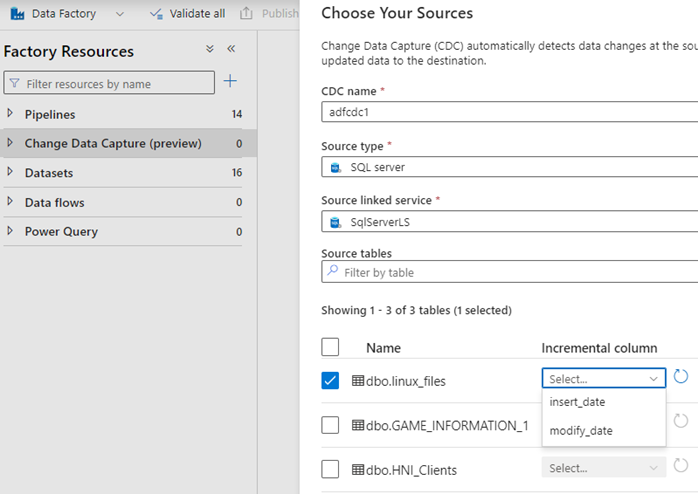
After selecting it you will be requested to select the database, its linked service and the table and its columns that you are going to enable the CDC.
Please keep in mind that there should be date column present for the table to be enabled CDC, the source selection option will not populate the tables that don’t have the date column.
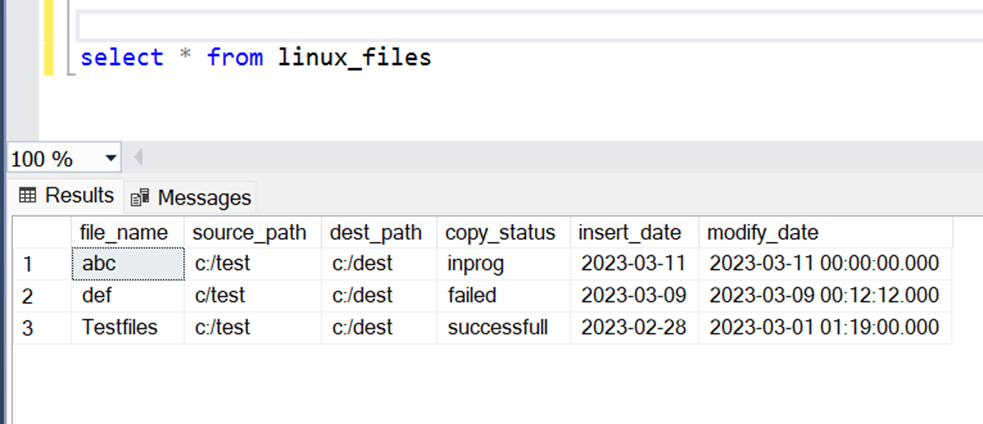
I have selected a table with modify_date column which contains date.
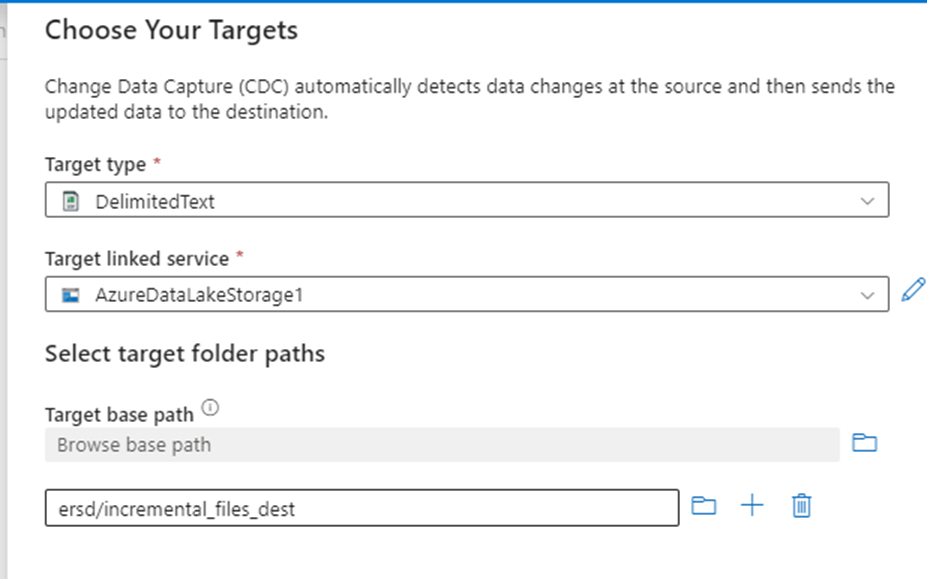
The destination I want the incremental to be copied is a file type. I chose this because I want the changes to be saved as separate CSV files, there are many types including sql server database tables which you can select as per your choice.
Once after this when you click on next you will see the CDC canvas with the CDC instance is starting with the source and destination you have selected listed below.
CDC will be billed as a separate instance with 4 v-core compute just like as any other compute as long as it is running.

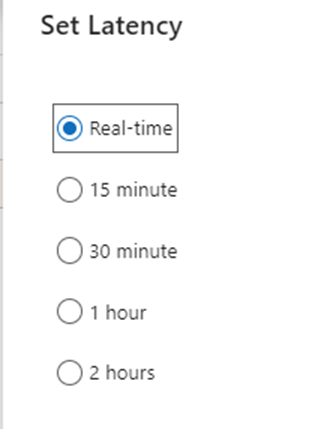
- Select the checkbox for the table you want to enable the CDC. There might be multiple tables depending upon the selection you have made in the previous steps which you can enable/disable as per the need.
- Set the latency interval under which the CDC will run. Currently the default is 15 mins, but I am going to set it real-time which means the changes will be copied as soon as it is made in the source.
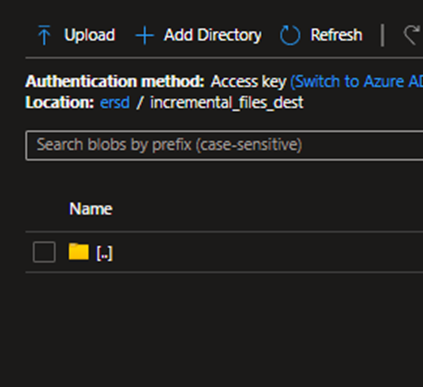
With all the settings has been made, let’s go ahead and publish it first and then test it. First let’s check the number of records in the source and the destination ADLS container where the changes are going to be copied as CSV files.
You cannot publish when the cdc instance is running, stop it first, publish it and then start cdc instance again.
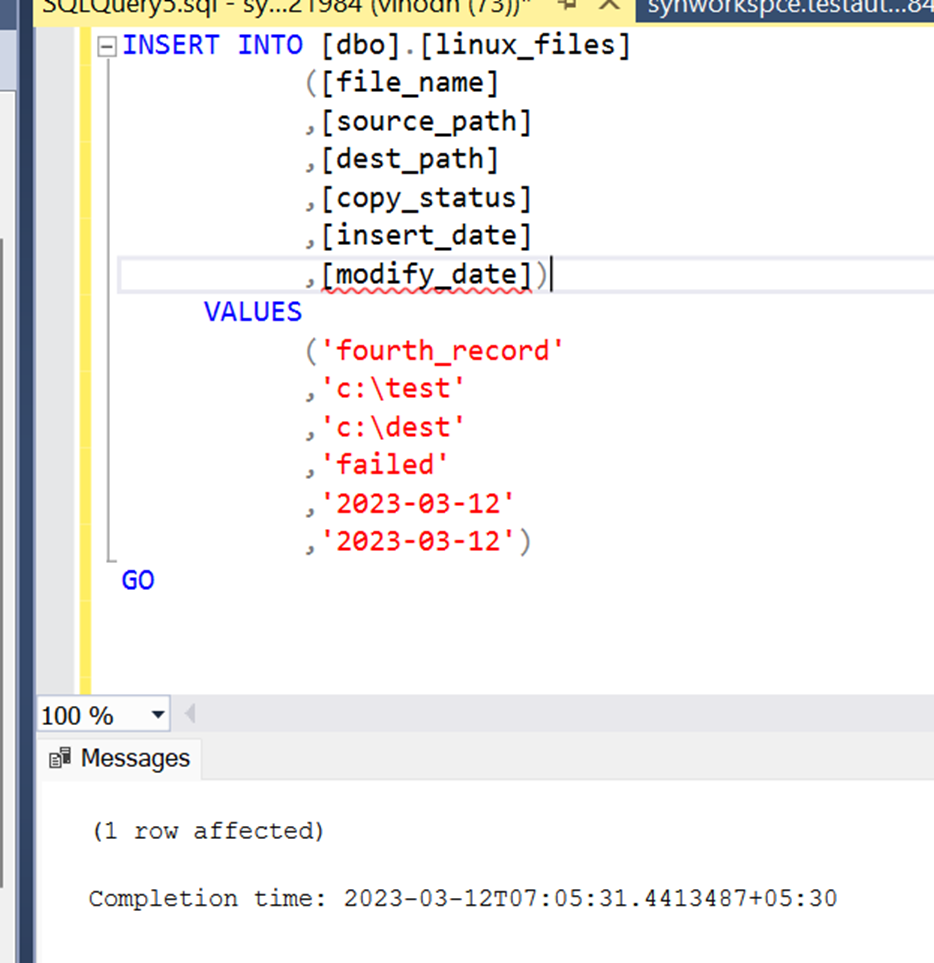
Now lets go ahead and insert one records into the table.
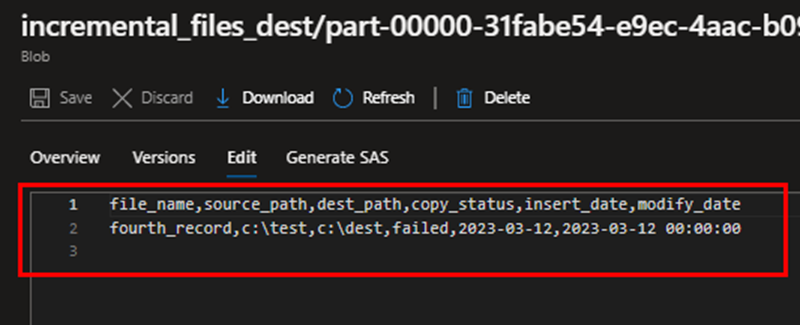
Now check the destination folder you will receive two files one contains the changes, and the other is log file indicating the result; success or failed.
incremental_files_dest/_SUCCESS
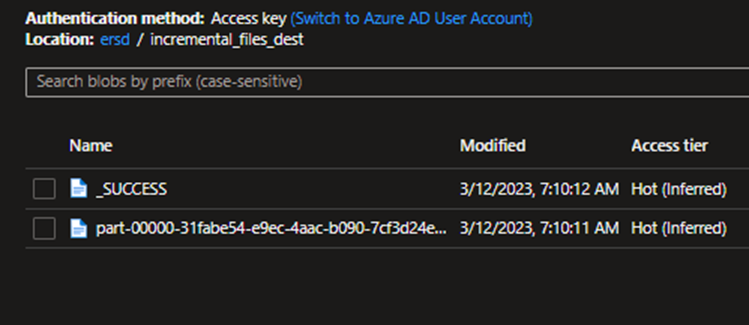
incremental_files_dest/part-00000-31fabe54-e9ec-4aac-b090-7cf3d24e551d-c000.csv
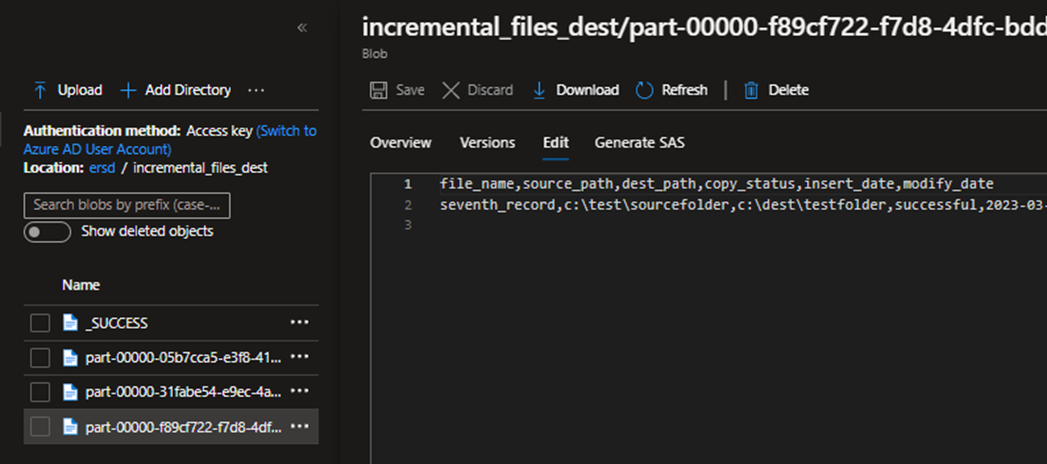
Let me add 3 more records to the table.

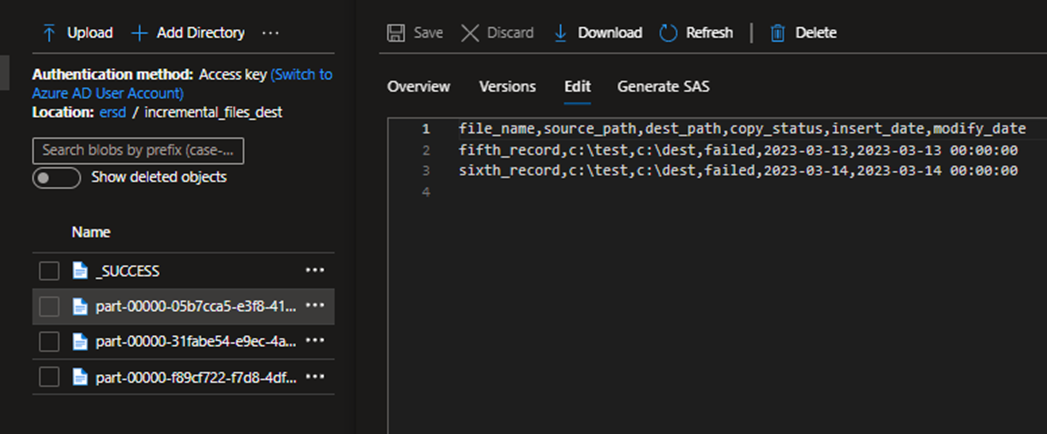
The last record was saved as separate file because I consumed a few mins of gap between the two inserts. Since we have set the latency to bare minimum, the process picked up the record as soon as it was written to the table.
Summary:
We have seen the real time implementation for change data capture feature in data factory. But beware that there might be newer challenges/errors that you must troubleshoot when implementing with massive data sets as this is relatively new feature in ADF.