Dynamic data masking is a feature that is available in Synapse analytics to restrict the exposure of sensitive data to the end users. We can configure data masking to hide sensitive data in the result sets that are queries by the users. Using data masking we can not only restrict also specify the amount of sensitive data that can be revealed with a lower impact on application layer.
Dynamic Data Masking – Key points:
Dynamic data masking feature works by replacing the sensitive data in transit without touching the source data (data at rest). This provides great benefit for the data management teams as they can always preserve the original data.
- Works in near real time and throws out the results without too much delay.
- Useful in protecting the data particularly in reporting/read-only scenarios.
- No need to process a copy of original data and setup processing to mask all data in advance.
- Acts as a layer of security for protecting sensitive data stored in the tables.
- Some performance overhead will be unavoidable as all the traffic to the database will be inspected.
- Users can bypass the layer by directly connecting to the database and query the data unmasked thereby causing the purpose useless.
Steps:
I have created a dedicated pool in synapse and created a table with few rows for demo. Remember you can create only external table and cannot create a user table in a built-in pool, hence make sure you create a dedicated pool before proceeding.
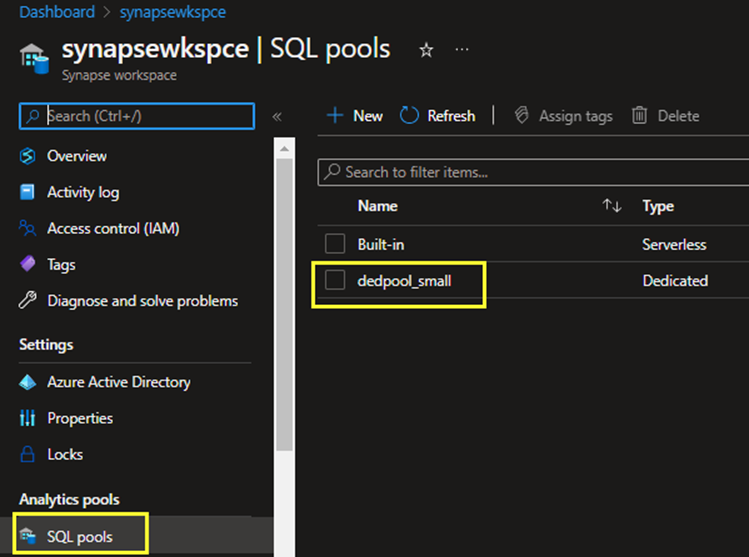
On the left side stack in your synapse workspace select SQL Pools and then open your dedicated pool.
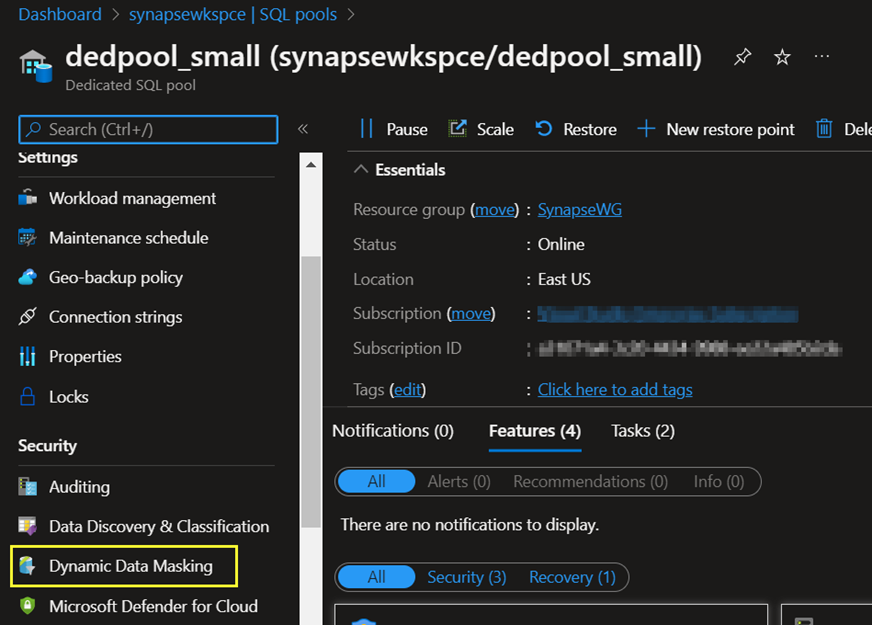
Once after that you will see similar page which is now dedicated pool settings page and on the left side column click on the Dynamic Data Masking option under Security tab.
In the next option you can add your tables into masking using the given options. The numerical banners in the screenshot have been explained below.
- Add the tables into masking à more about this in the next section.
- The masking rules that already exists which you have created previously.
- You can exclude any user apart from user with administrator role from masking. They will see the data unmasked when they try to query the data.
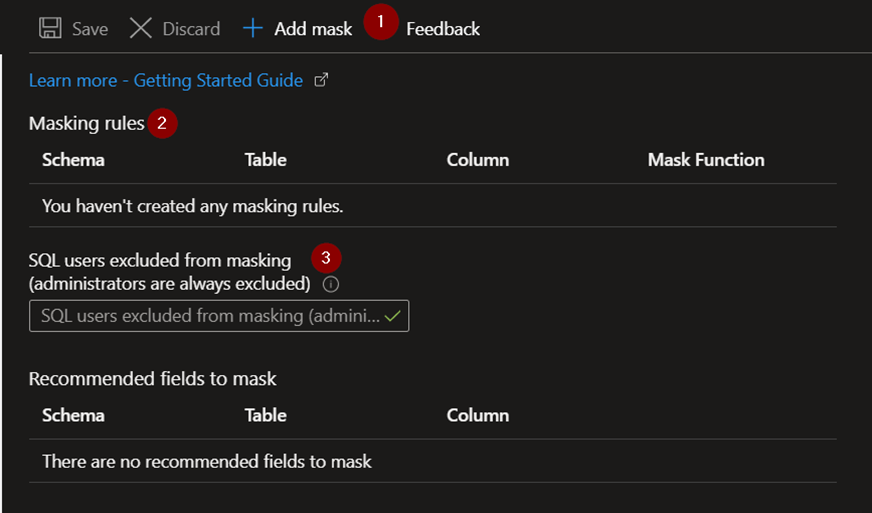
Let us see how to select the tables using +Add Mask button.
Basically, I am trying to mask two columns from the Employees table. As shown below once when you chose the column then you have the option to select the masking format.
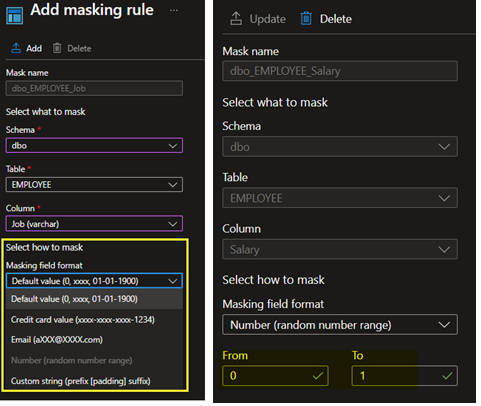
In the above image I have selected the default value format for the column Job and set the masking condition to have the contents on its own for all the column values. Similarly, I have added one more column Salary and set to be the random number range format so It will randomly fill the data with 0 to 1.
For testing purpose, you can also use synapse query window, synapse notebook, azure data studio or SSMS to run the queries. For this demo I have connected the dedicated pool in SQL Server management studio just to show you how well a synapse database can be handled from SSMS, especially for SQL database users this would be easy to grasp.
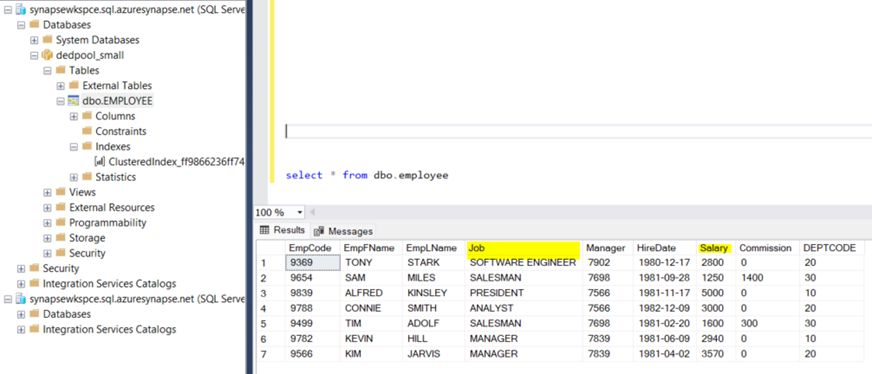
When I selected all the rows from employee table, we can see both the columns Job and Salary does not mask the data instead because the login I did from has administrator privilege. By default, all the logins with admin privileges can query and view the data without masking. So, I will create a new login with data_reader permission to check.
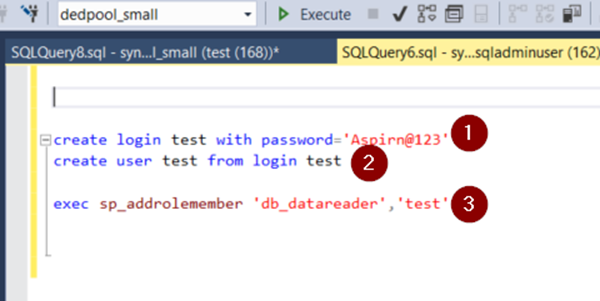
1 –> Create the login from master database
2 –> Change database context to our user database to create user account corresponding to the login we just created
3 –> In the same database context run the add role command to add the privilege to the user created
Now in a new window connected by the new user account created, test the command.

Now you can see how the database is being masked for both the columns.